In this tutorial, you will learn how to make a player with limited vision using Light2D nodes.
The limited vision mechanic consists of:
- Enemies outside the vision range should not be visible.
- Lights and shadows should affect the environment.
- Walls should interrupt the line of sight.
You can download the full project of this tutorial here.
We are going to use two Light2D nodes to implement this effect. One will add light and shadows to the environment, while the other will occlude the lit area’s enemies.
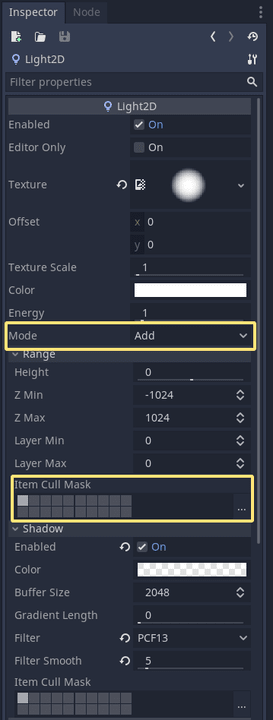
For the first light, add a texture and enable shadows by checking Shadows->Enabled. You can find a soft circle texture to use for your light in the project linked above. Set that the Mode attribute to Add. Doing so adds the light’s value to underlying pixels.
We can use the light’s cull mask to control which nodes it affects. Update the Range->Item Cull Mask property of the light so it only has Layer 1 enabled. That’s the first rectangle in the top-left of the grid.
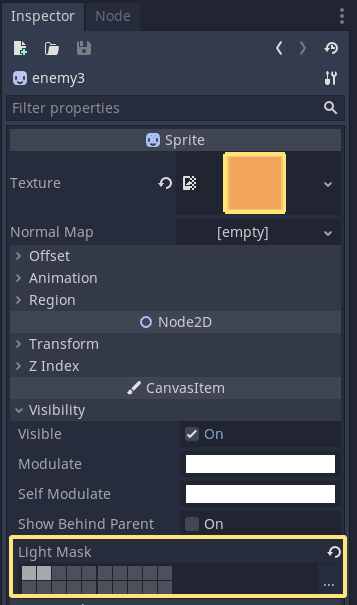
By default, all sprites are on the light layer 1. You can change that by selecting any node that extends Node2D, including sprites and tilemaps, and changing their Visibility->Light Mask property.
For the second light, use the same texture, enable shadows, and change its Mode to Mask. The mask mode hides sprites outside the light’s area.
Set its Range->Item Cull Mask to Layer 2. With this, the light only applies the mask to nodes with Layer 2 enabled in their Visibility->Light Mask.

All nodes you want the mask to occlude should have Layer 2 layer enabled in Visibility->Light Mask.
In the demo project, the Player and TilemMap nodes have only Layer 1 enabled in Visibility->Light Mask.
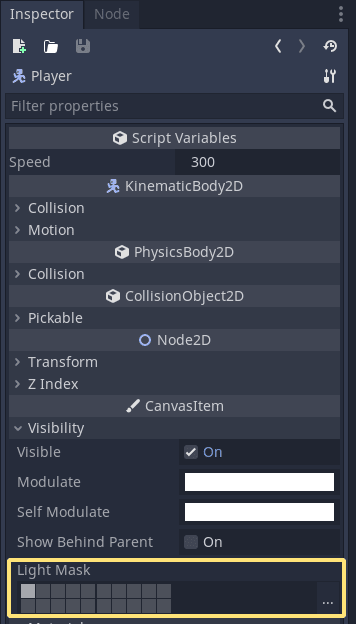
Enemies have both Layer 1 and Layer 2. As a result, the masking light will only occlude enemies.
Made by
Our tutorials are the result of careful teamwork to ensure we produce high quality content. The following team members worked on this one:
Tutor
Founder
